Connall De Silva
Concept
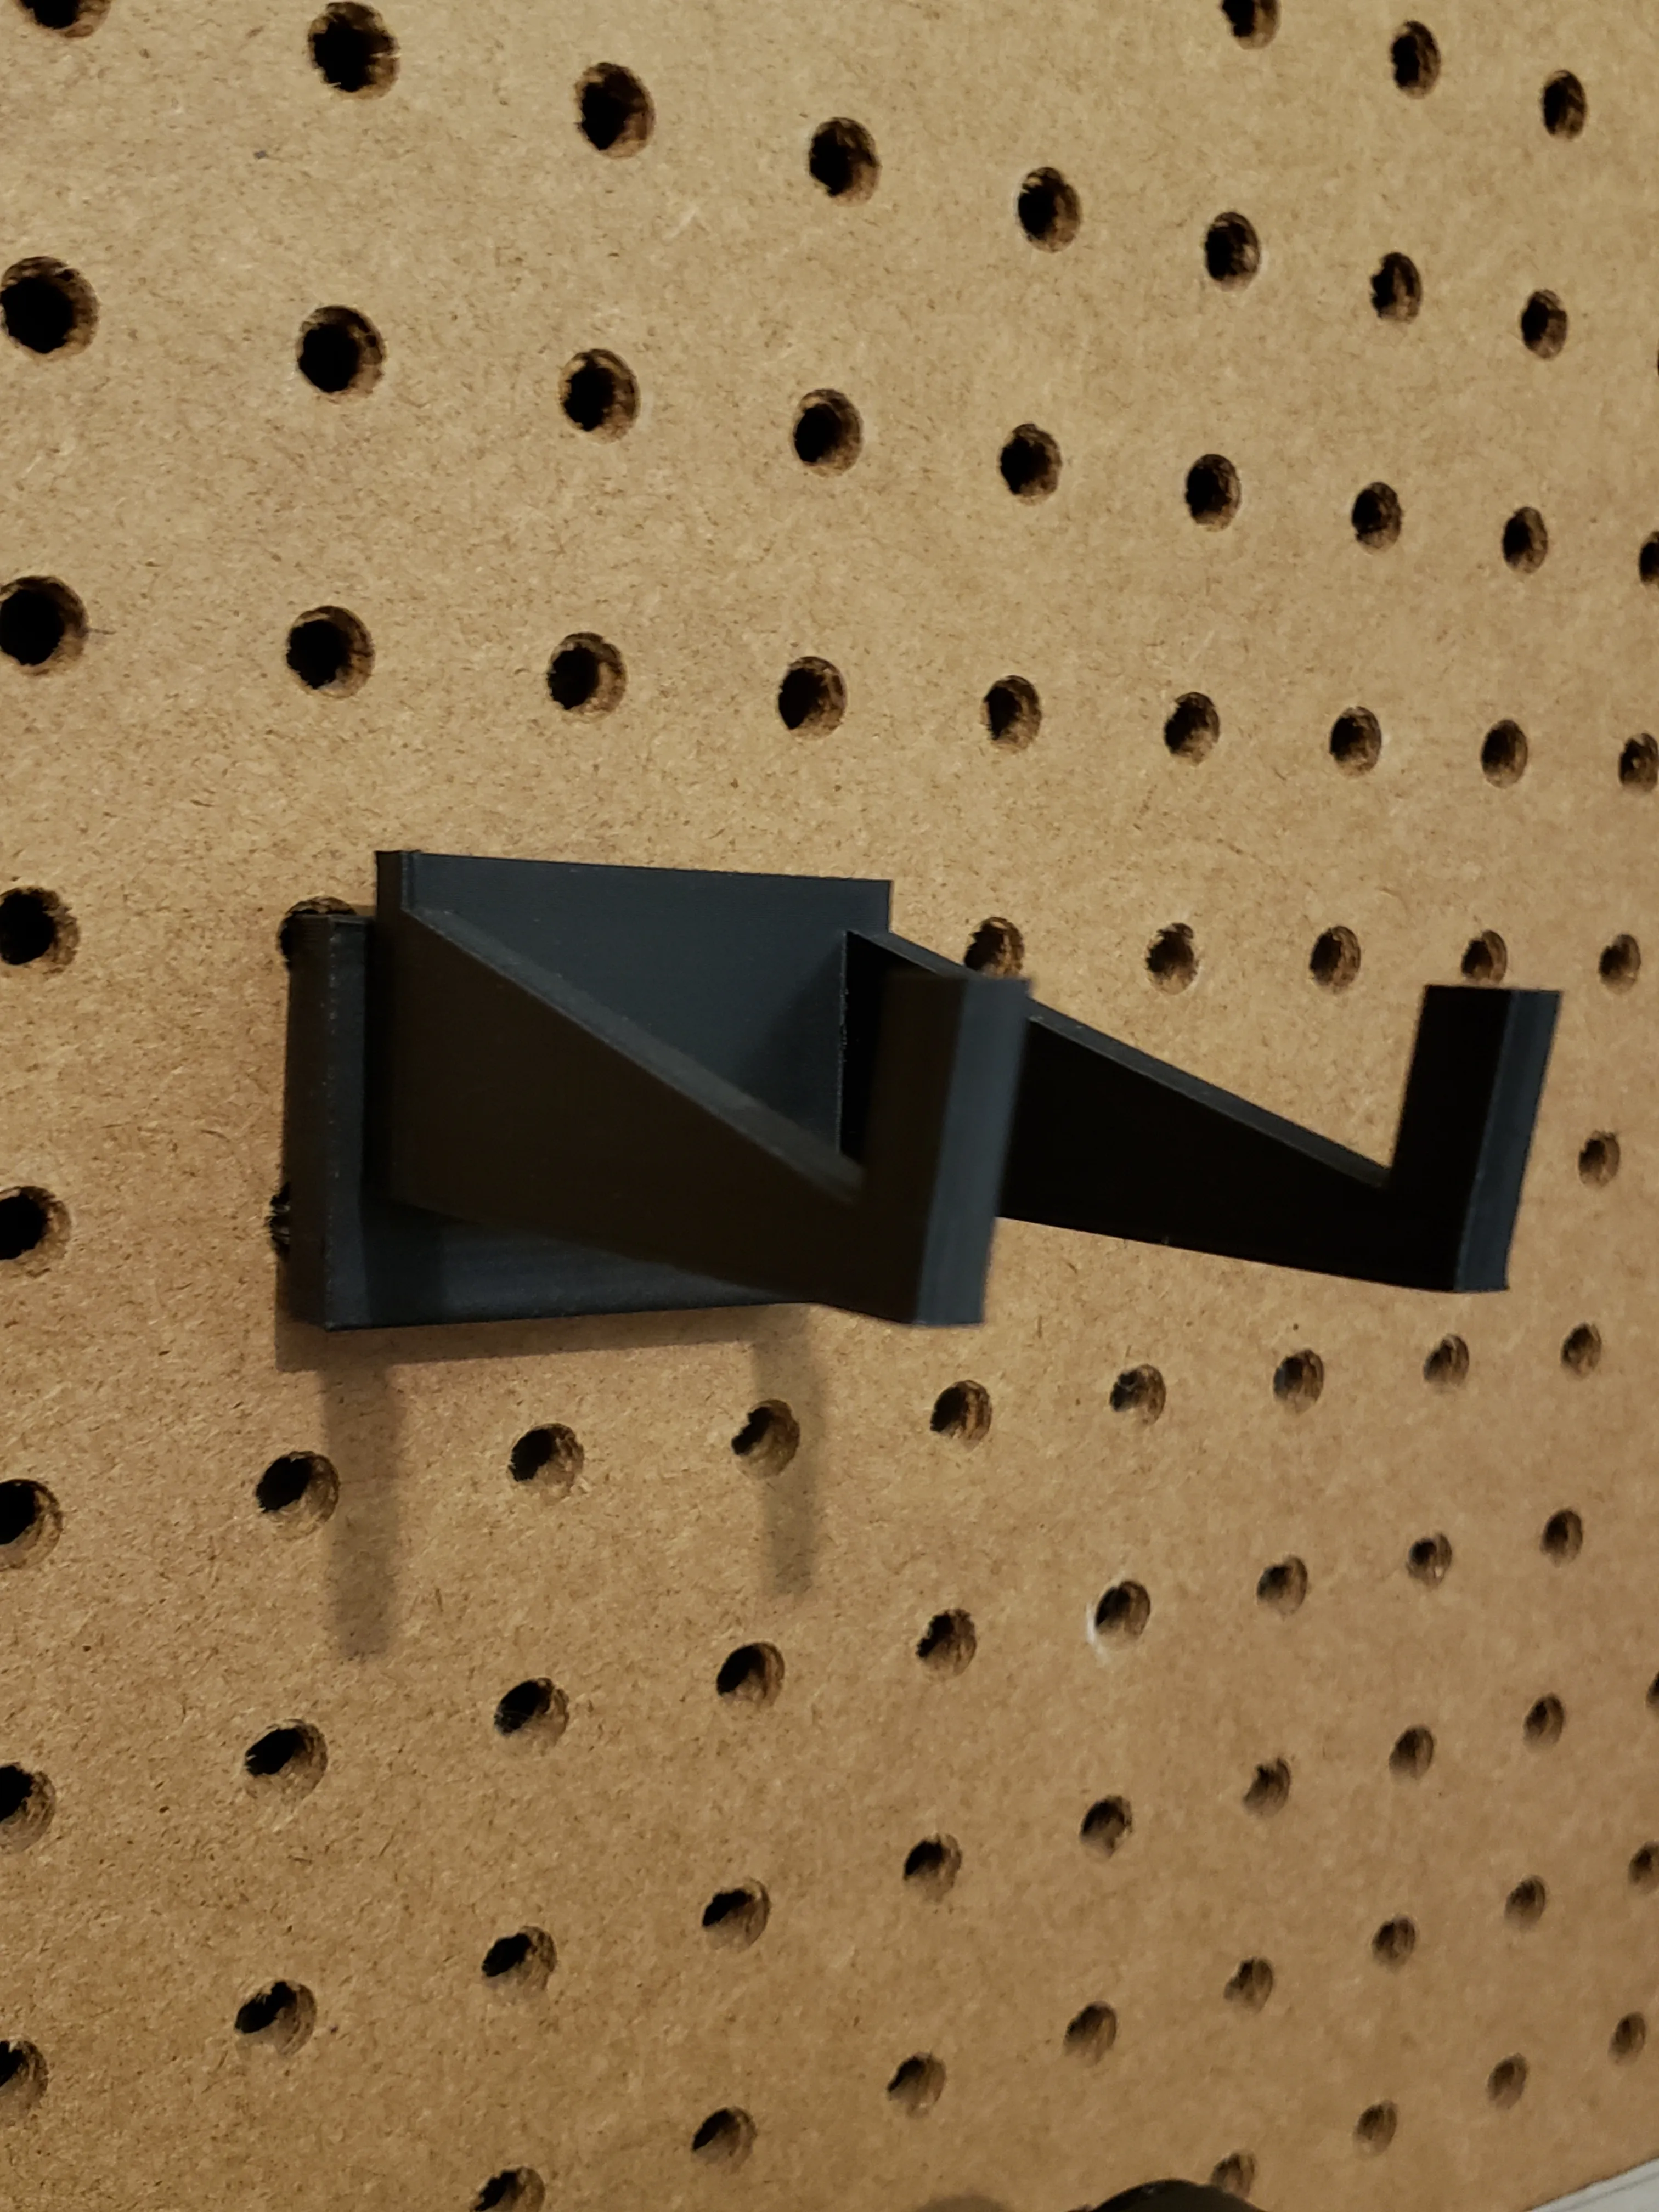
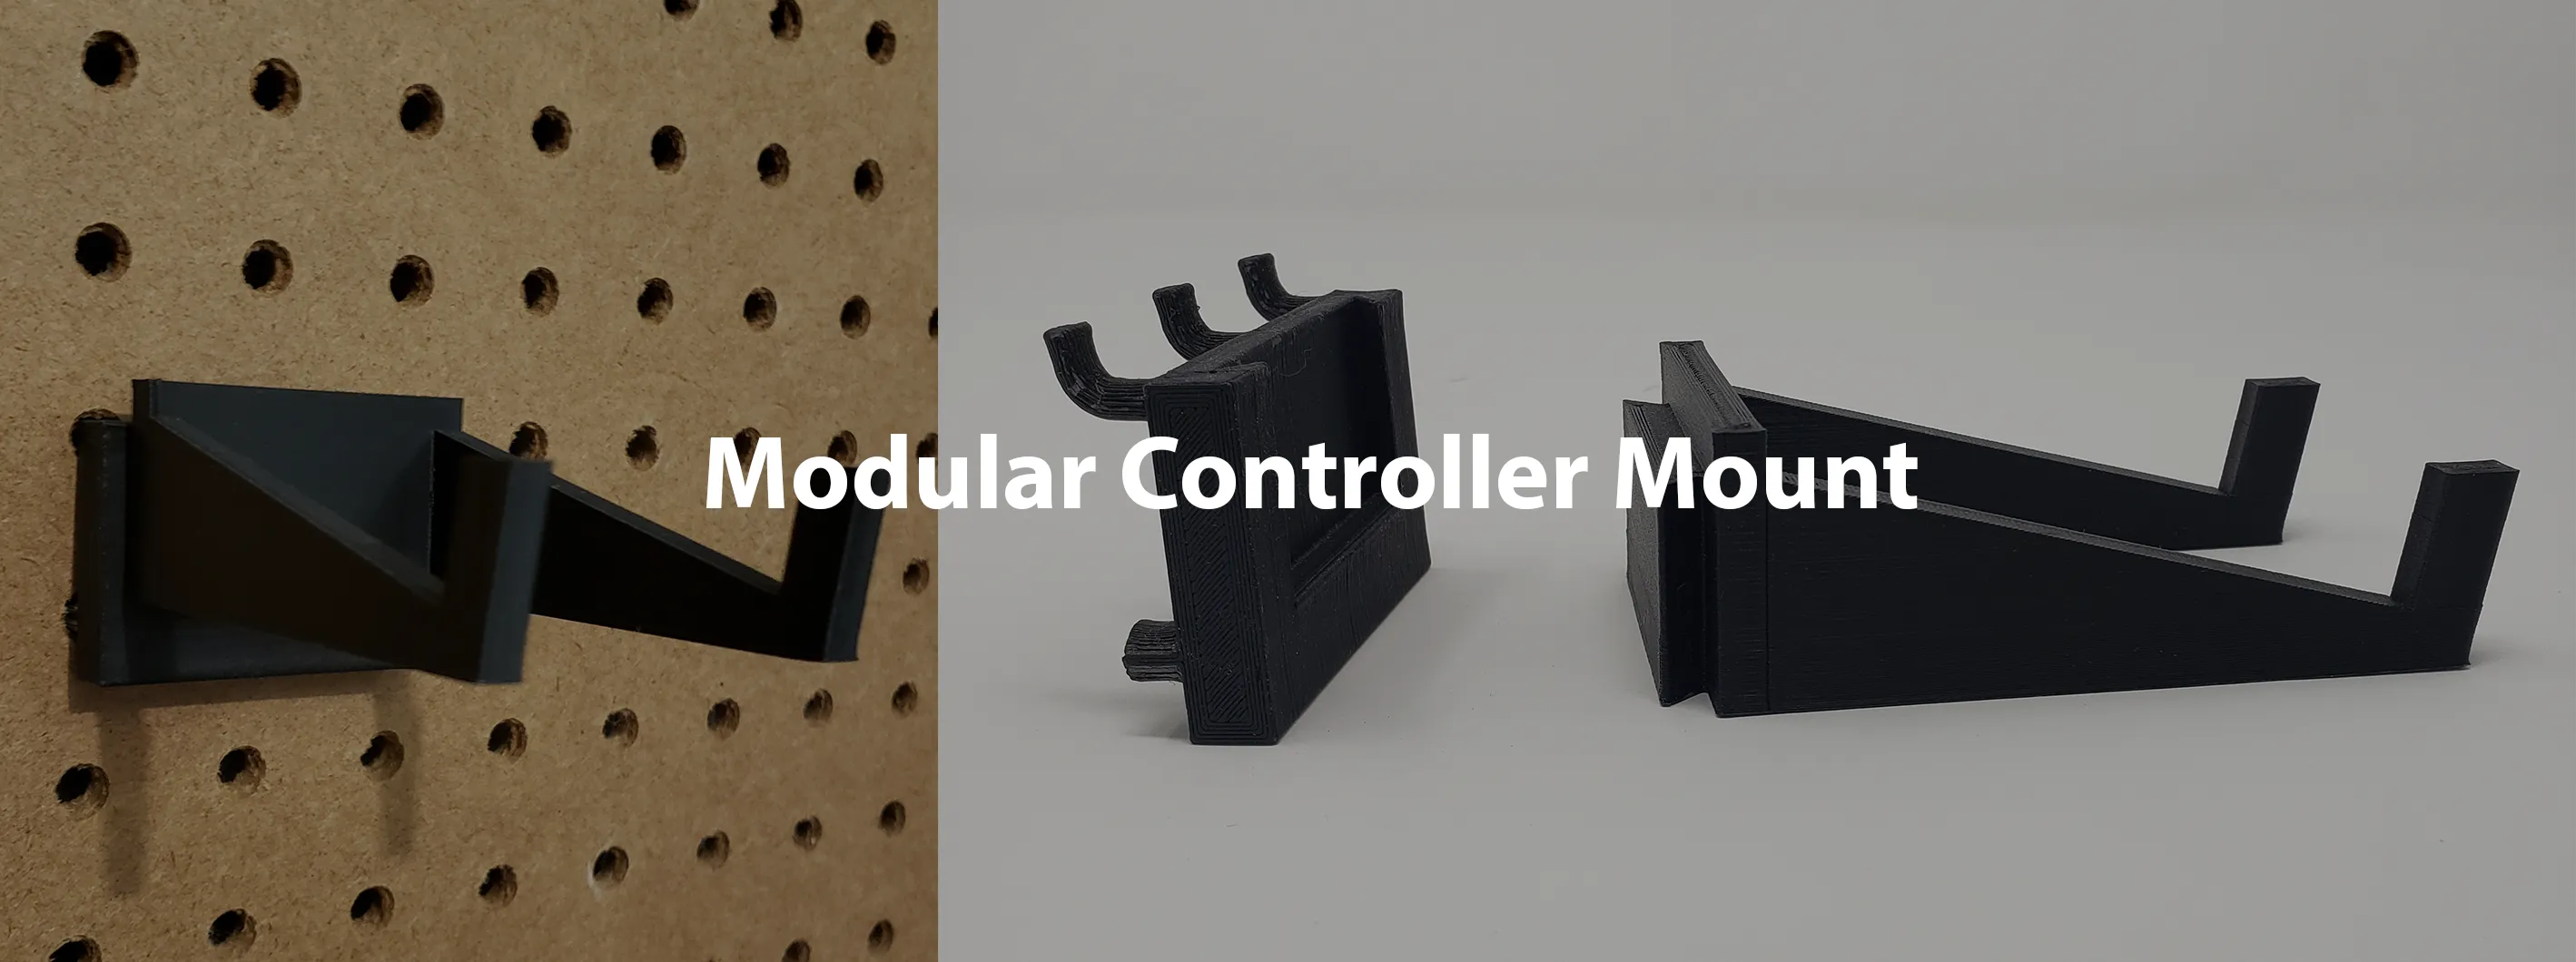
Modular pegboard mount system. Extensions are removable and interchangeable with different types of hangers, hooks and shelves. In the case of the inserts being damaged only the inserted mount that is placed in the pegboard would need to be replaced. This innovative system adapts to your changing needs effortlessly. Whether you're organizing tools, accessories, or decor, the versatility of this system ensures that your space remains tidy and tailored to your preferences.
Concept
A versatile accessory designed to keep your gaming controllers within arm's reach. Crafted to integrate with the modular pegboard mounting system, this sleek rest offers a convenient solution for storing and displaying your controllers while maximizing desk space and minimizing clutter.
Design Process
Design Concept
Design Considerations
When designing the controller mount there were certain considerations that must be met.
1) It must use an interlocking system between the pegboard and extension.
2) The rest must be deep enough the take into account the over ear covers.
3) It must have a lip to prevent the headphones from falling if any contact with the headphones were made when on the mount.
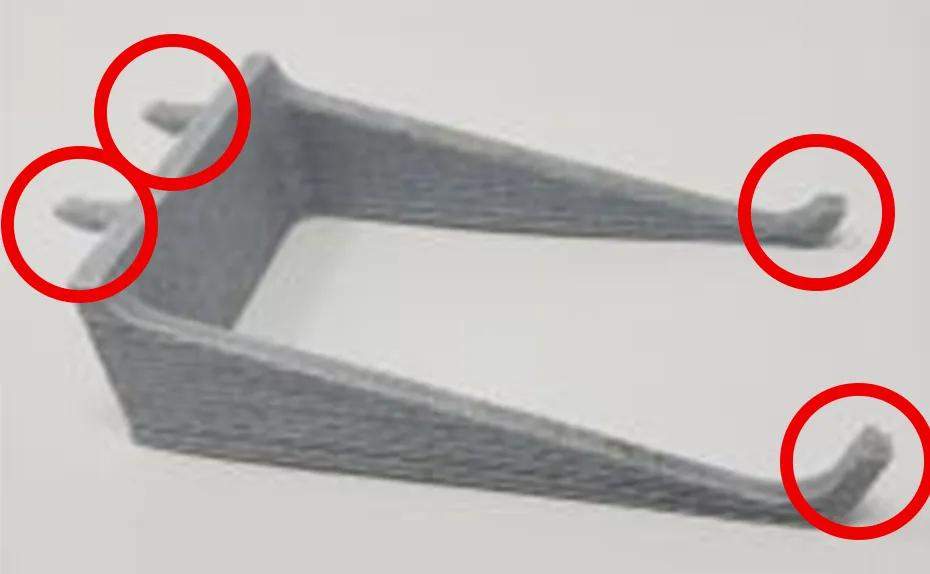
When it comes to pegboard hangers there are challenges to keep in mind when 3D printing on a FDM printer: layer adhesion and material strength. If a strong pull force or downward force is applied to a pegboard hanger, stress is concentrated on the L hooks that may result in breakage. Once broken the entire piece is wasted as the integrity of the hooks is completely compromised. To fix this some adjustments must be made.
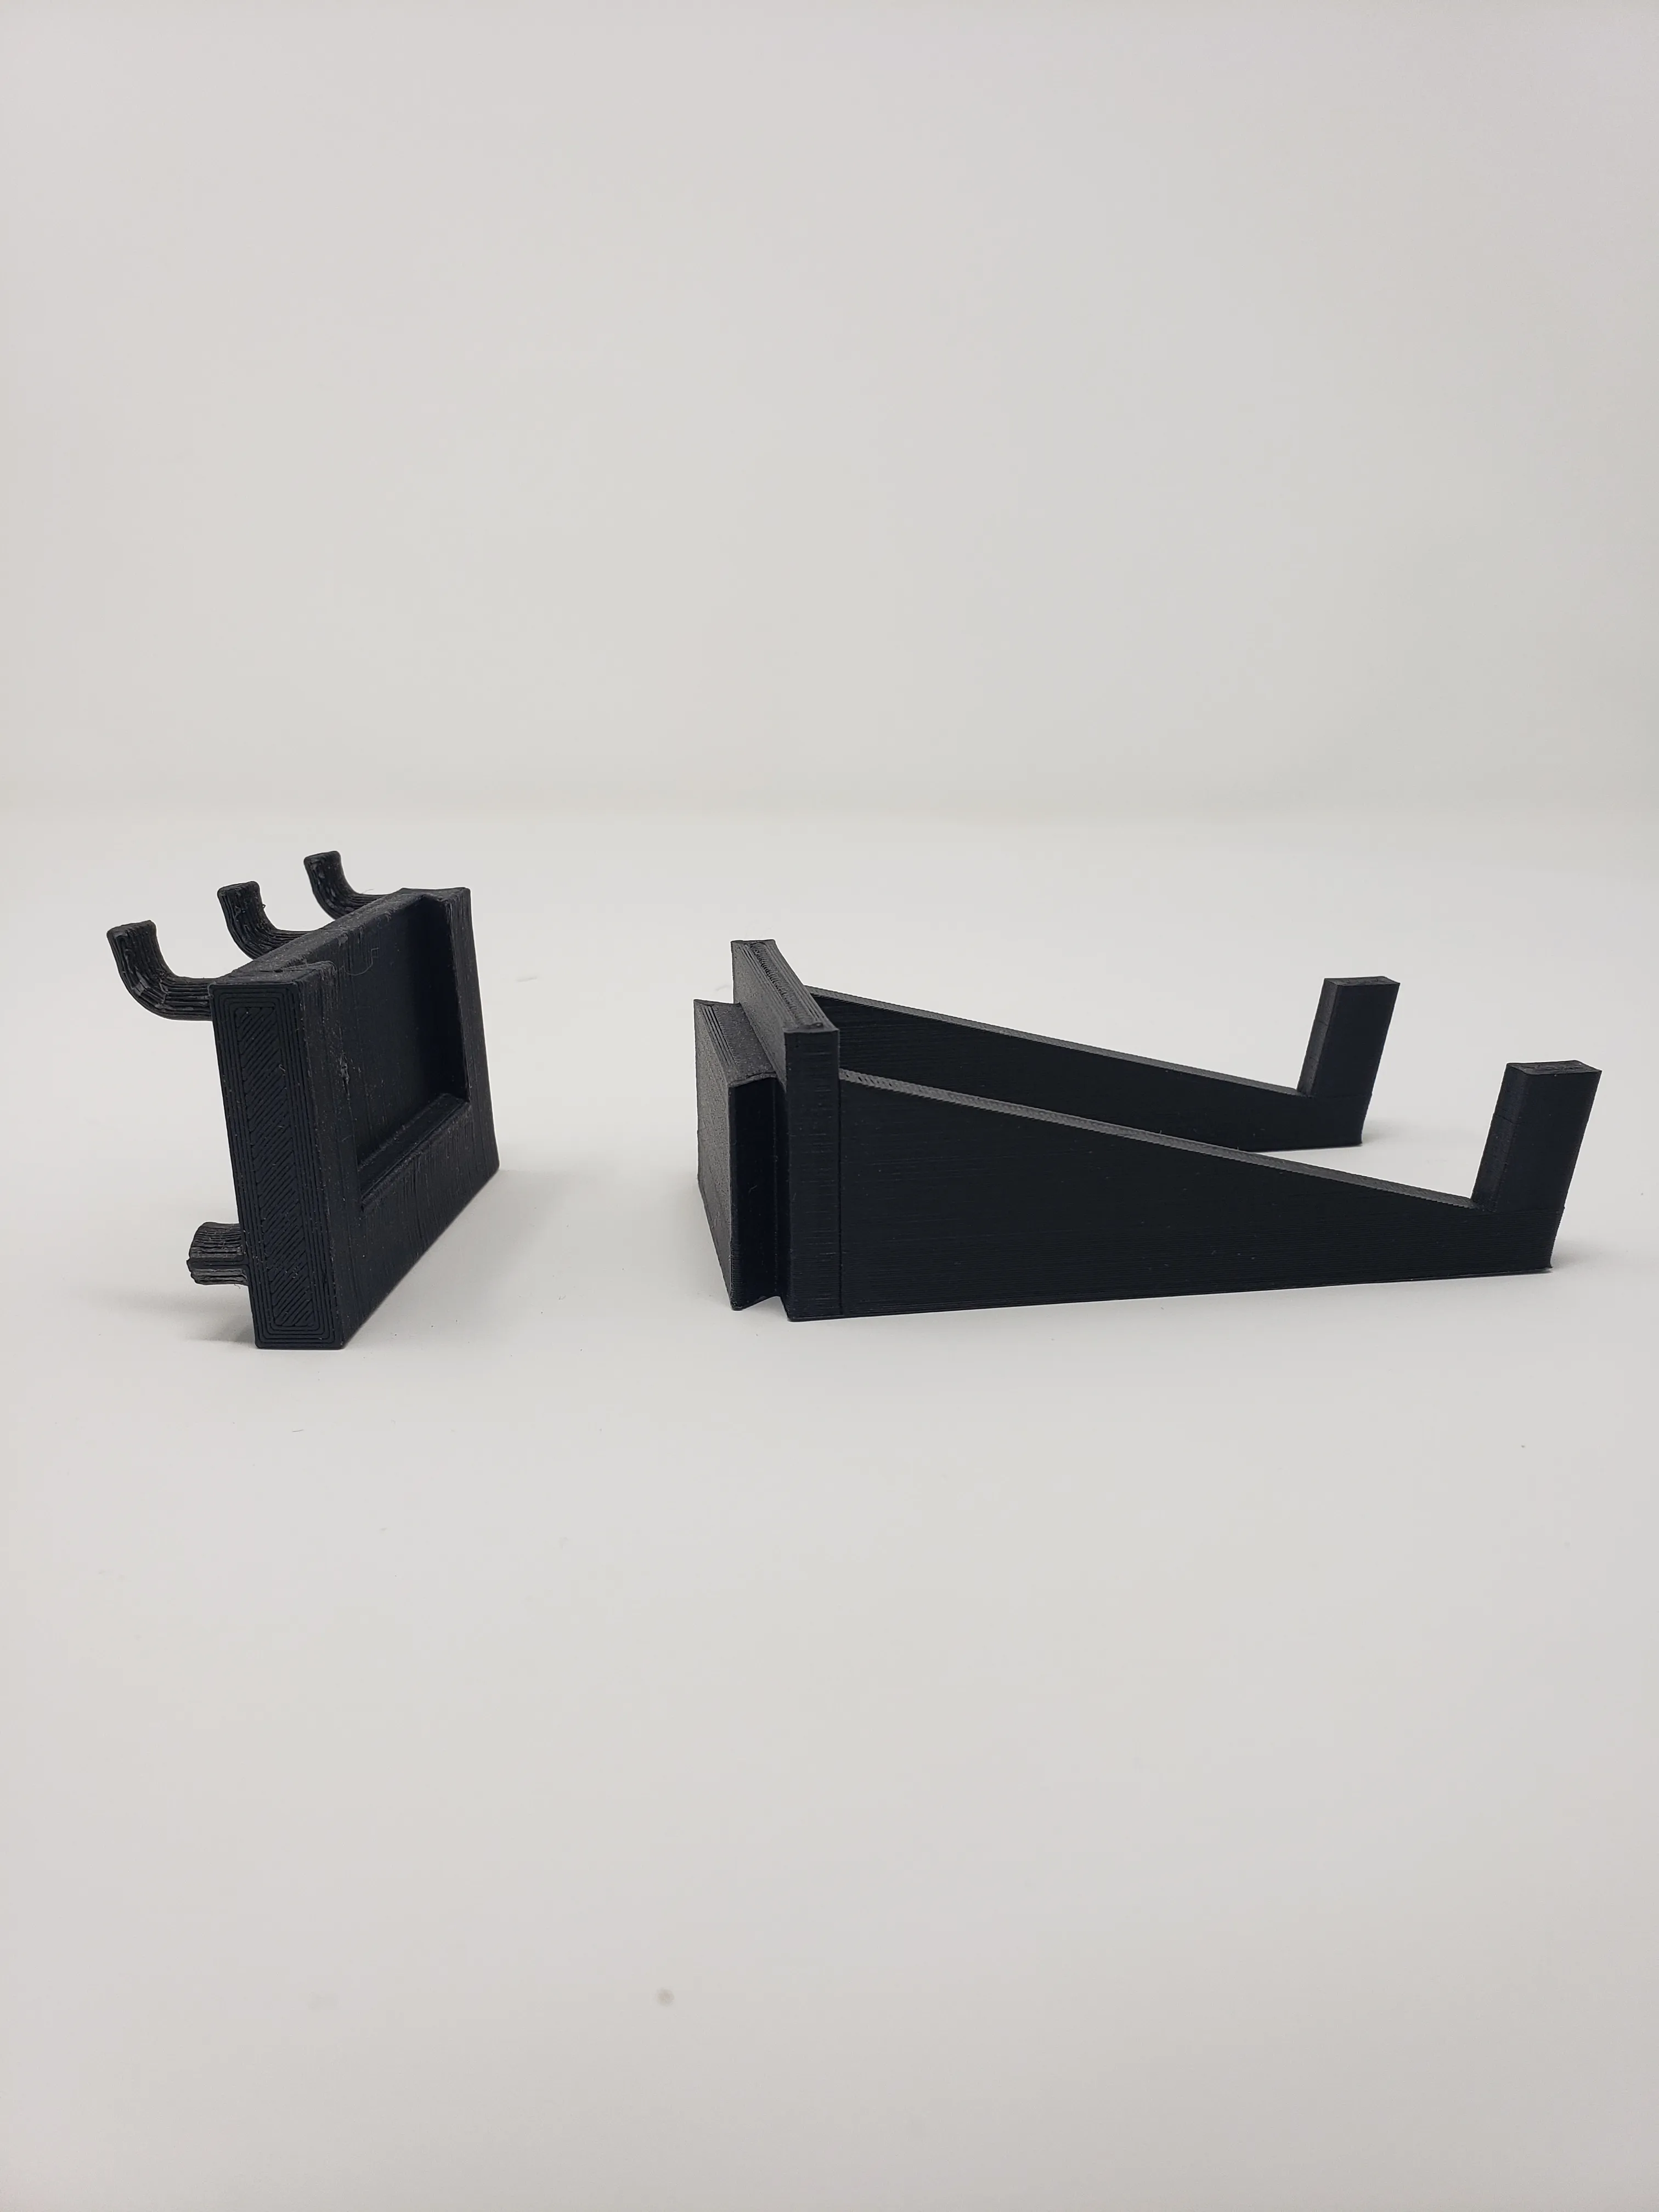
3D Model
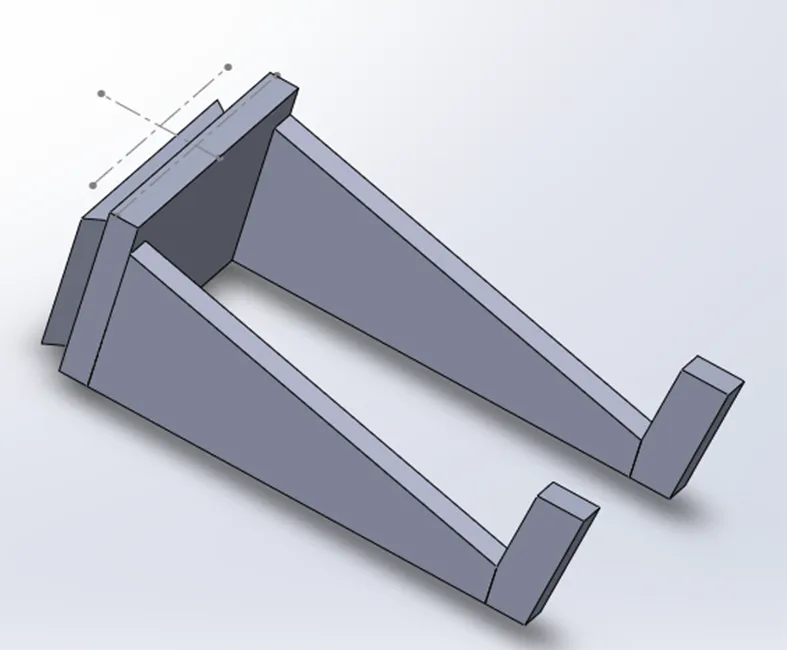
Slide in locking mechanism for easy hook replacements when wanting to change to a different hanger or hook
0.5cm x 0.8cm end supports for extra strength compared to other 3D models at 0.3cm x 0.3cm.
Fabrication
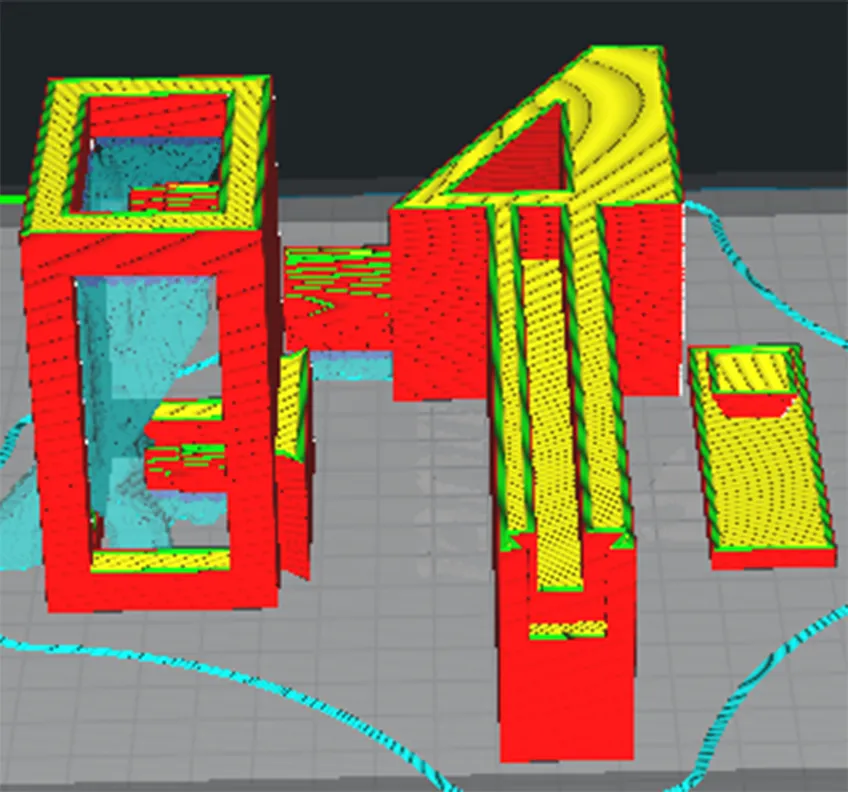
3D Print
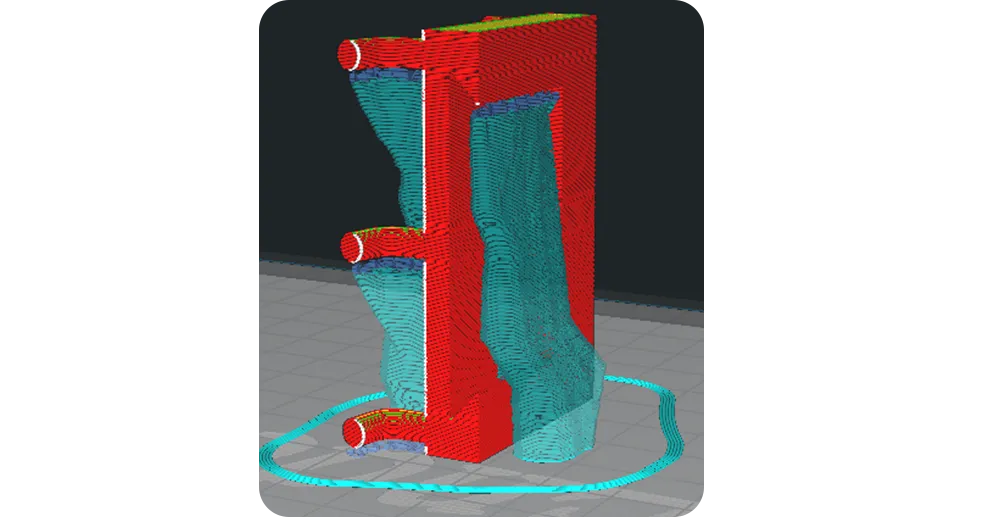
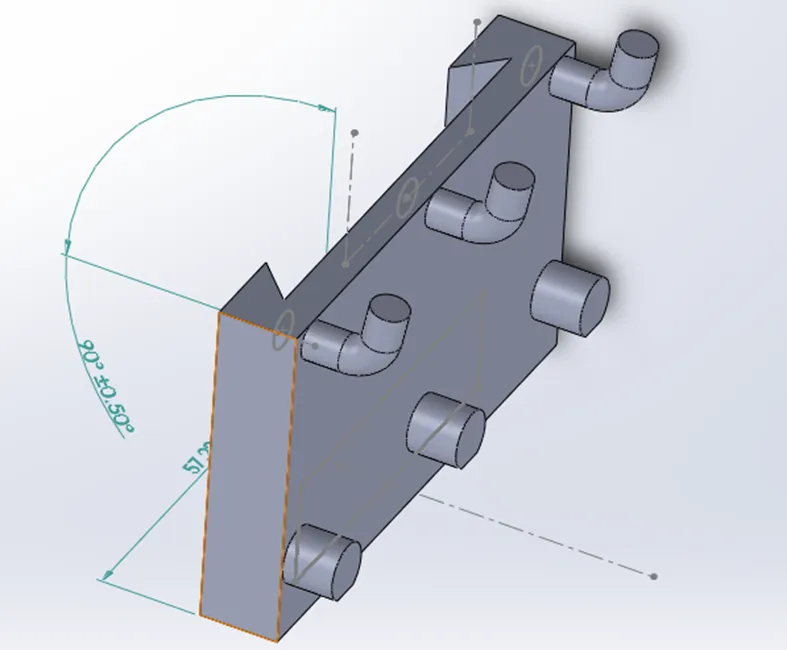
Layer adhesion is much stronger in this orientation. Therefore the part is printed in this orientation with supports to provide maximum strength to stress prone areas (hooks). In hindsight I would change the orientation to be on a 45 degree angle from the build plate to maintain the part's strength while mitigating as much support as possible.
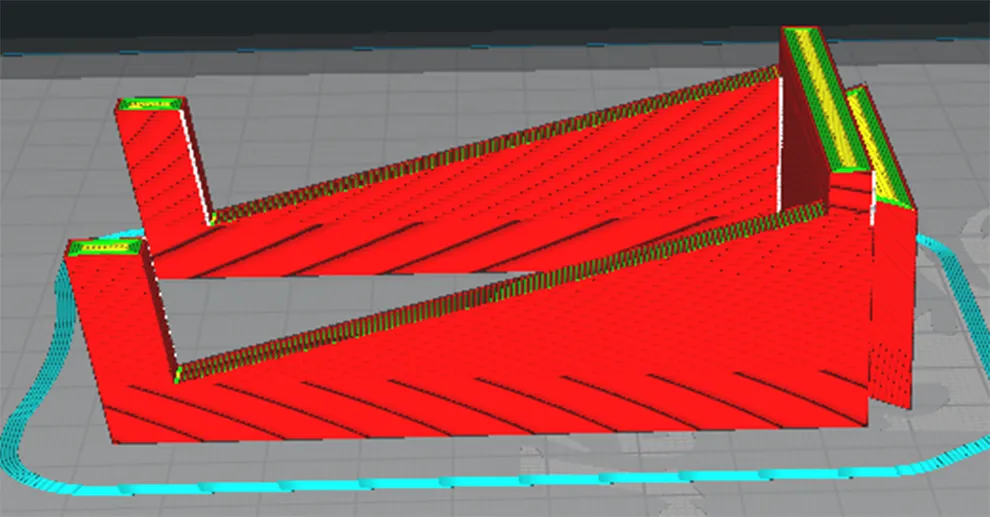
The larger end supports means that layer adhesion is not a big issue. Thus printing with no supports in this orientation to save time and materiel is preferred.
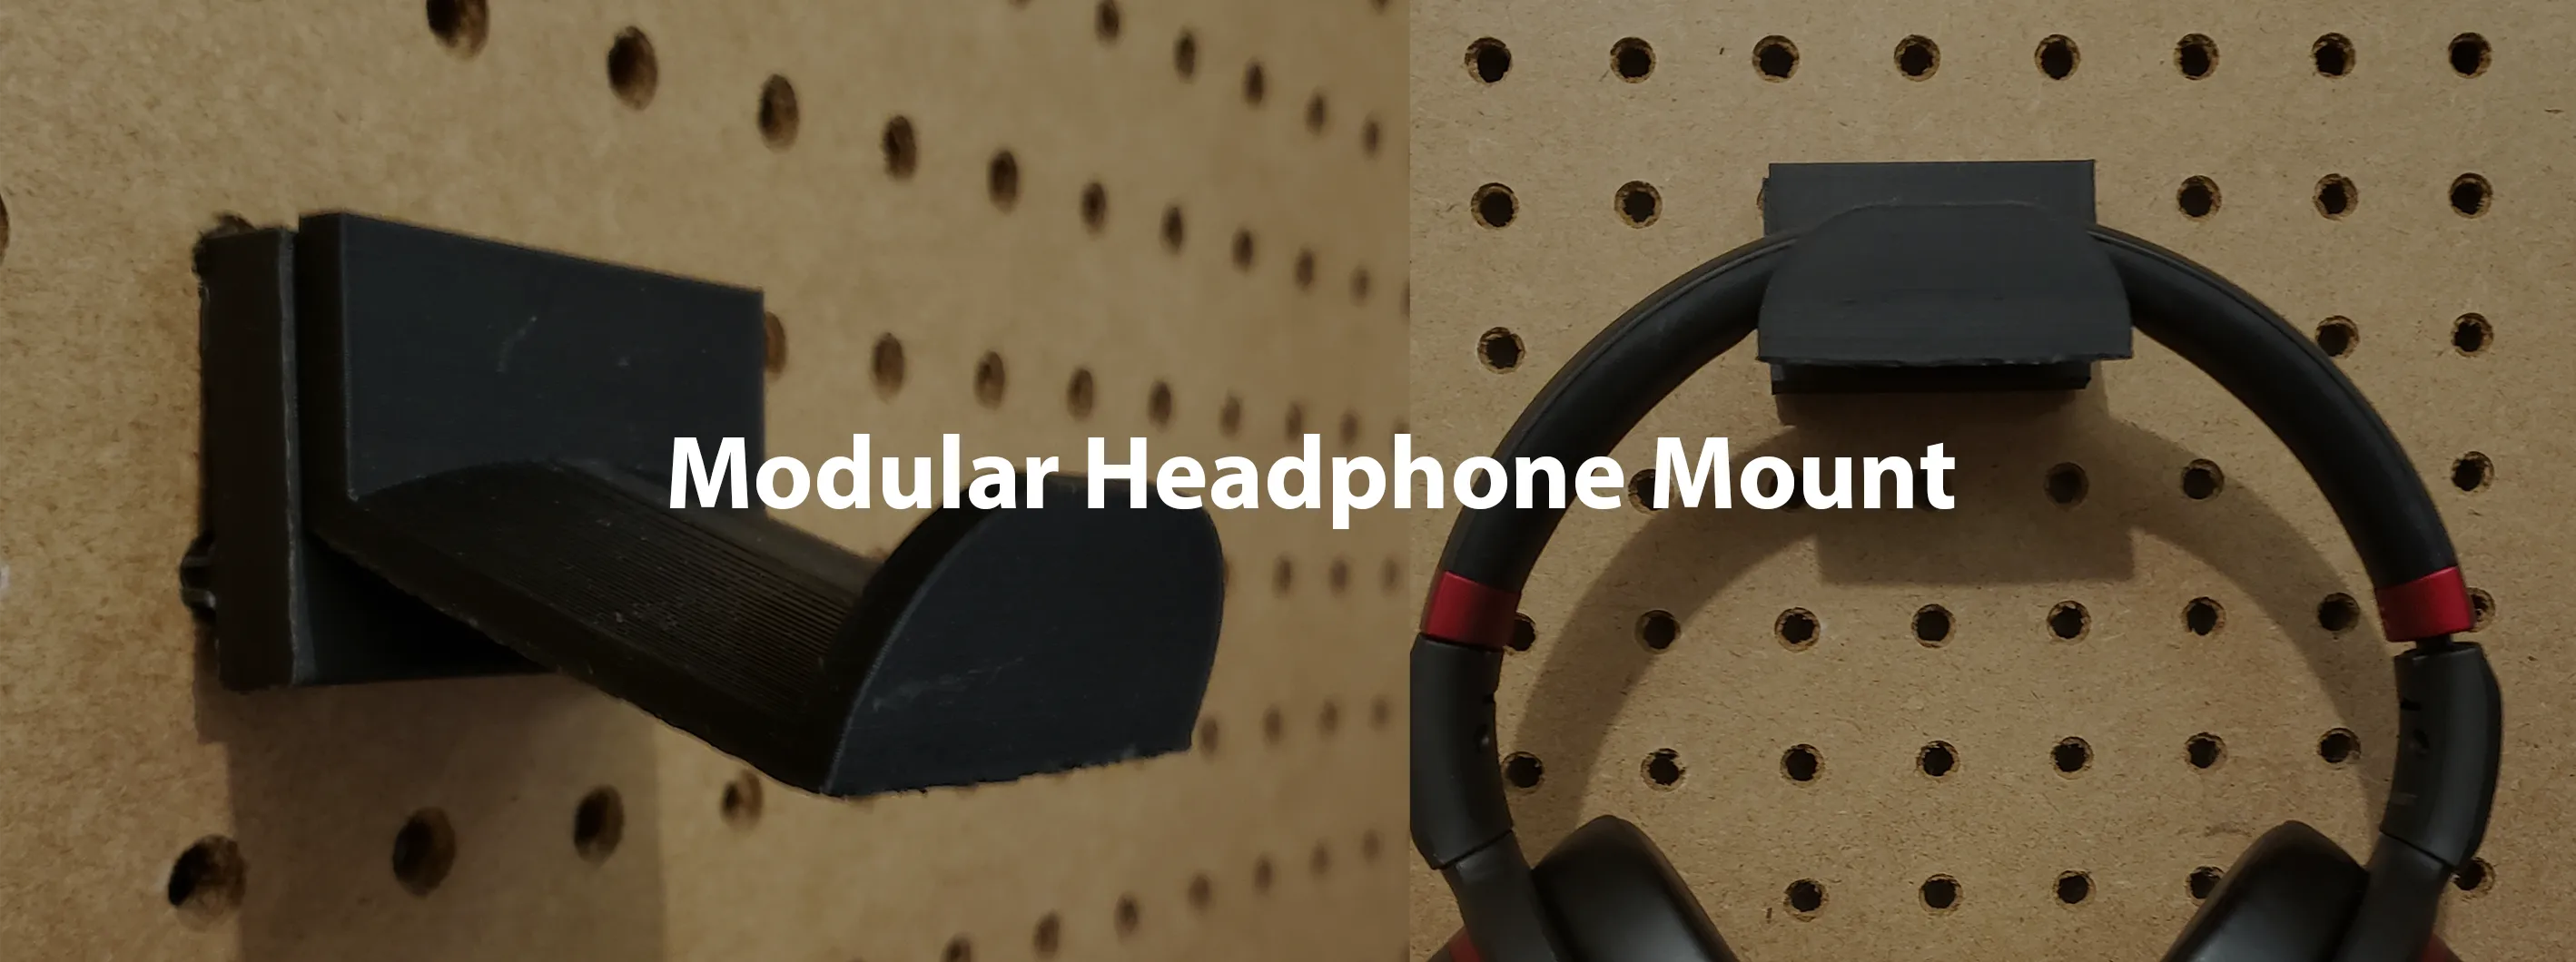
Concept
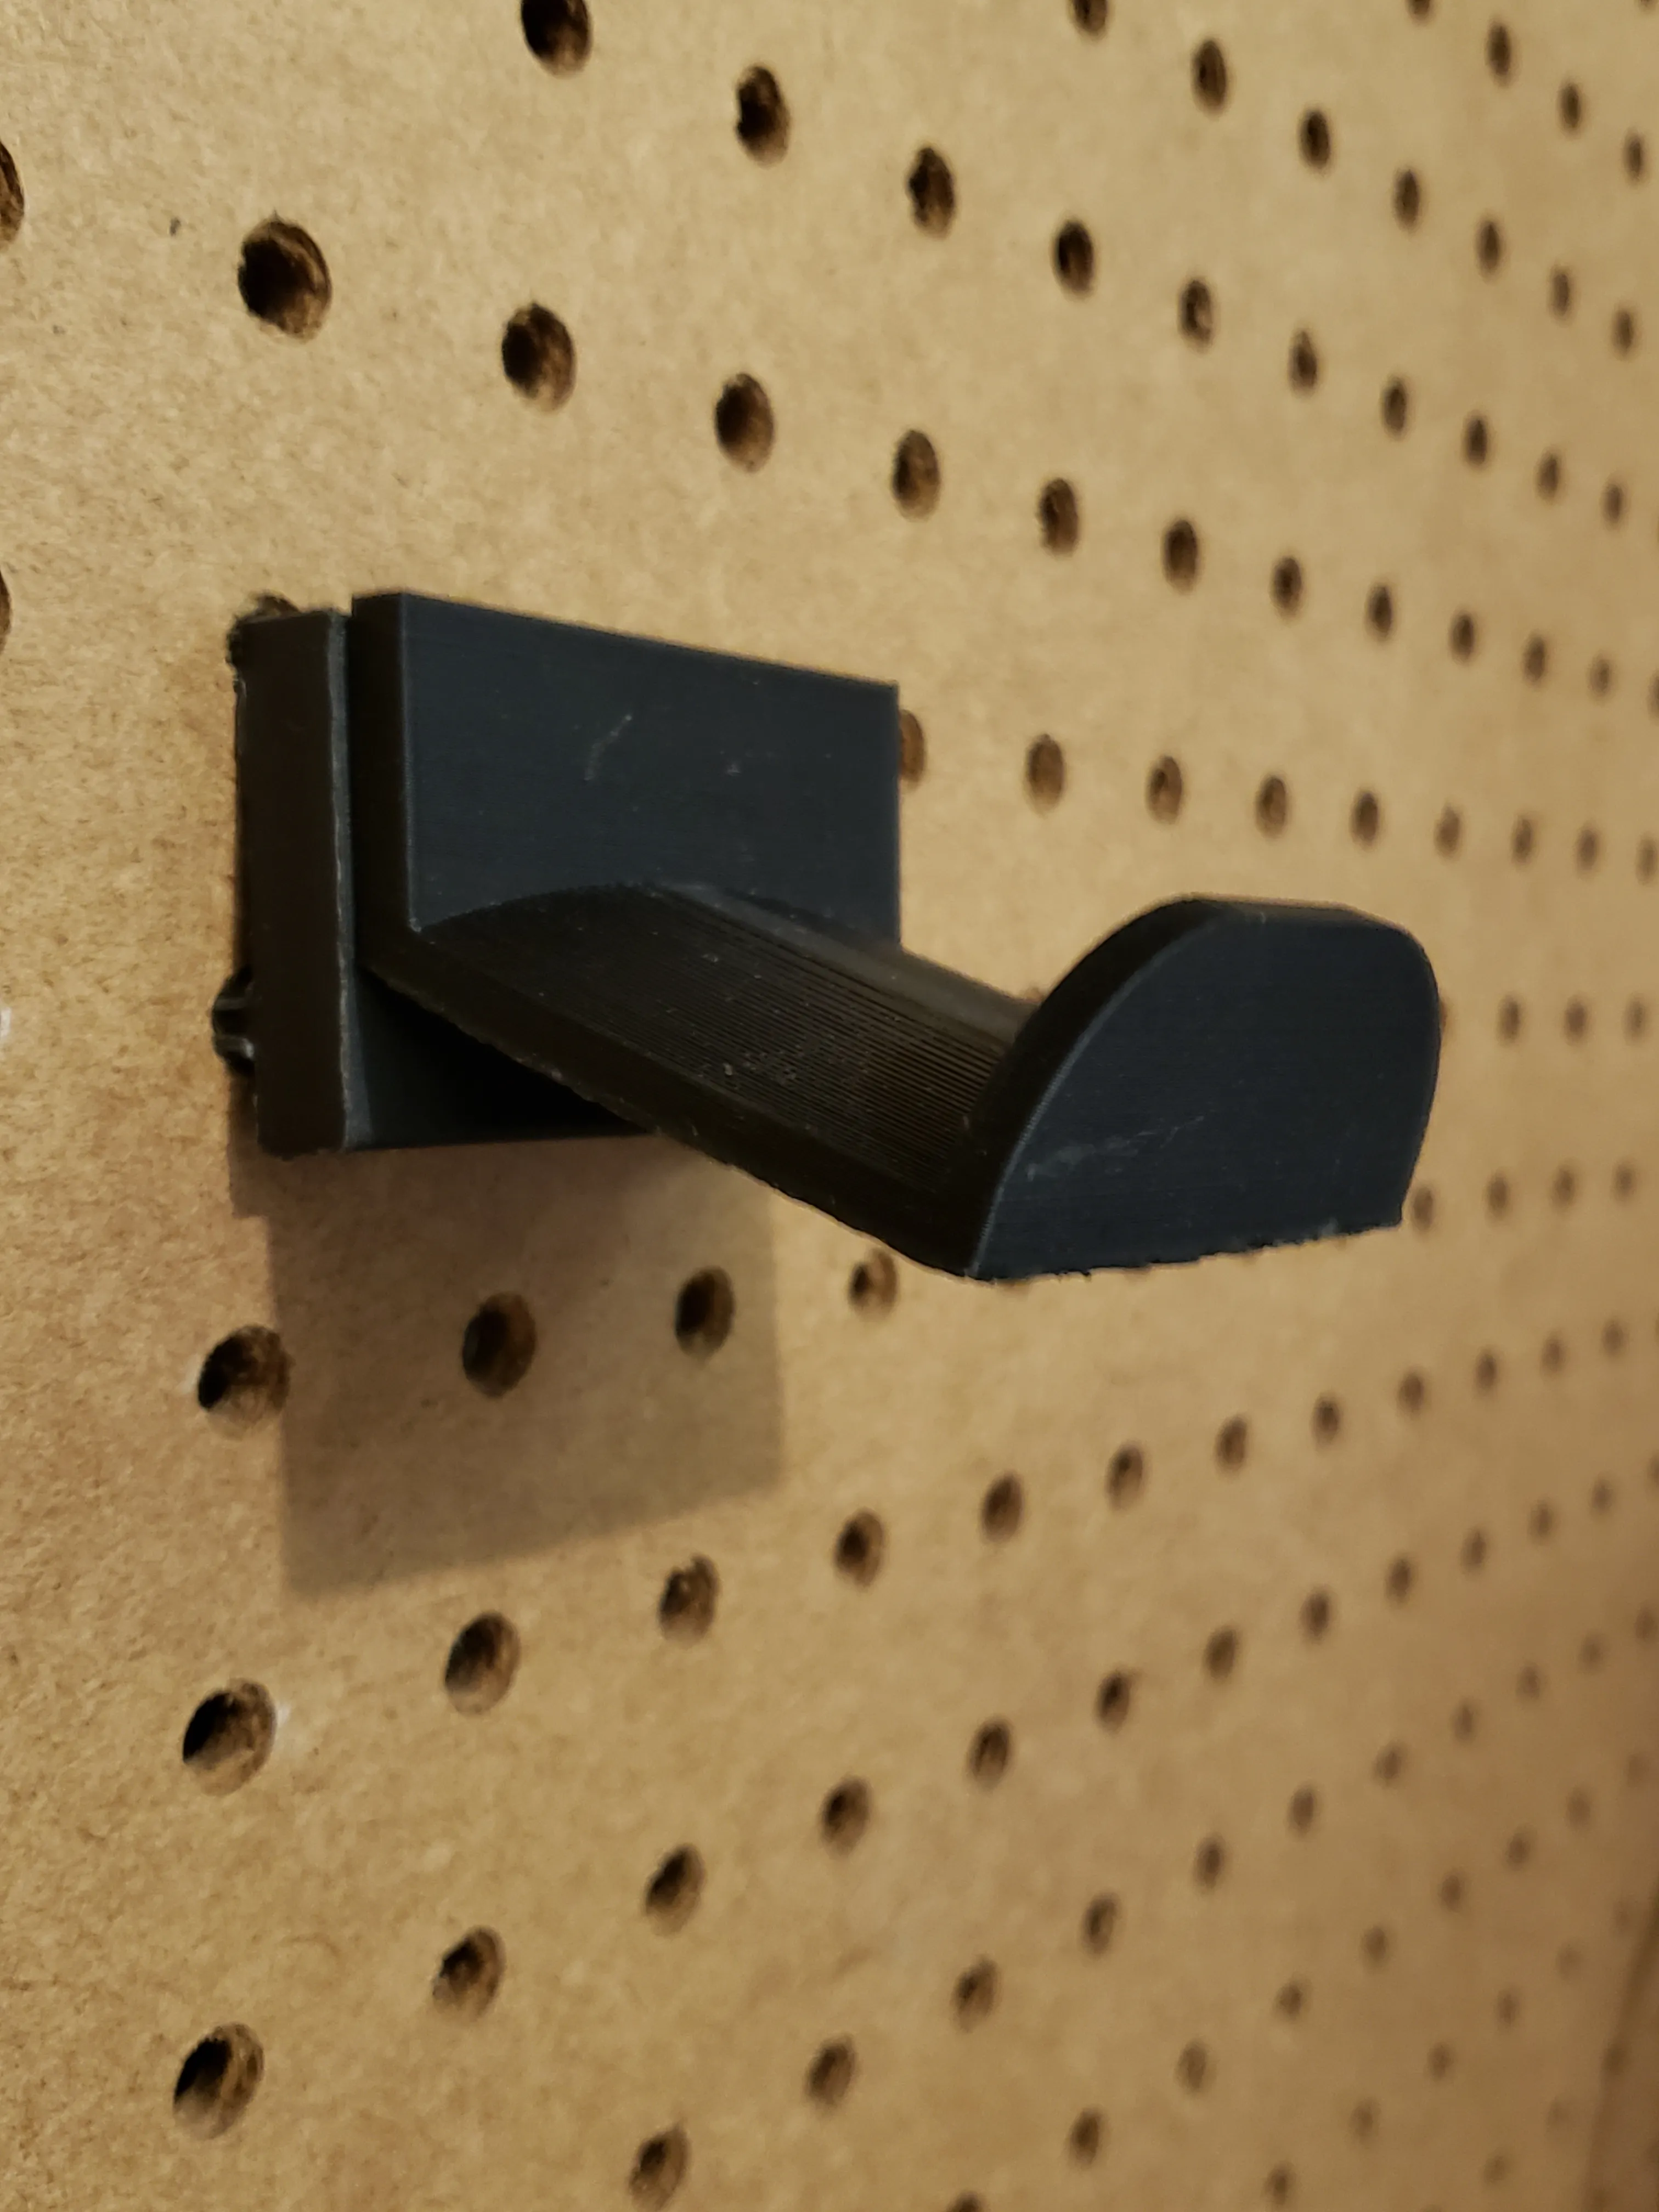
A sleek solution for organizing your headphones with style and efficiency. Designed to seamlessly integrate into the modular pegboard mounting system, this headphone rest offers a minimalist yet sturdy platform to keep your headphones safe and accessible, freeing up valuable desk space.
Design Process
Design Concept
Design Considerations
When designing the headphone rest there were certain considerations that must be met.
1) It must use the same interlocking system as the controller mount.
2) The rest must be deep enough the take into account the over ear covers.
3) It must have a lip to prevent the headphones from falling if any contact with the headphones were made when on the mount.
3D Model
Details
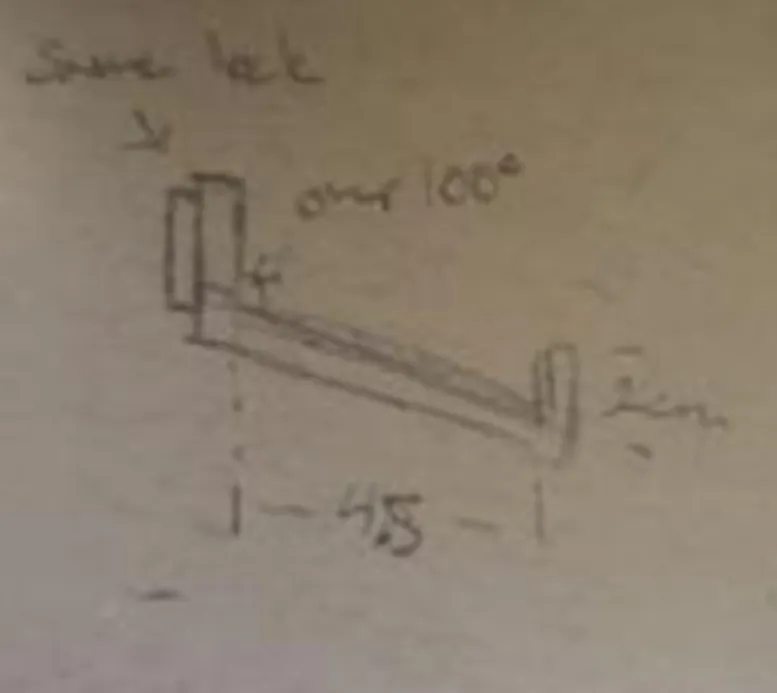
Base of the rest is 4.5cm deep providing enough clearance for the over ear covers of large headphones. It is also at a 110 degree angle so headphones will slide to the lip to be more secure. Base has a slight curve to it to from to the curve of the headband of the headphones. Lip is 2 cm high providing enough height to block even the most cushioned headbands from spilling over.

Fabrication
3D Print
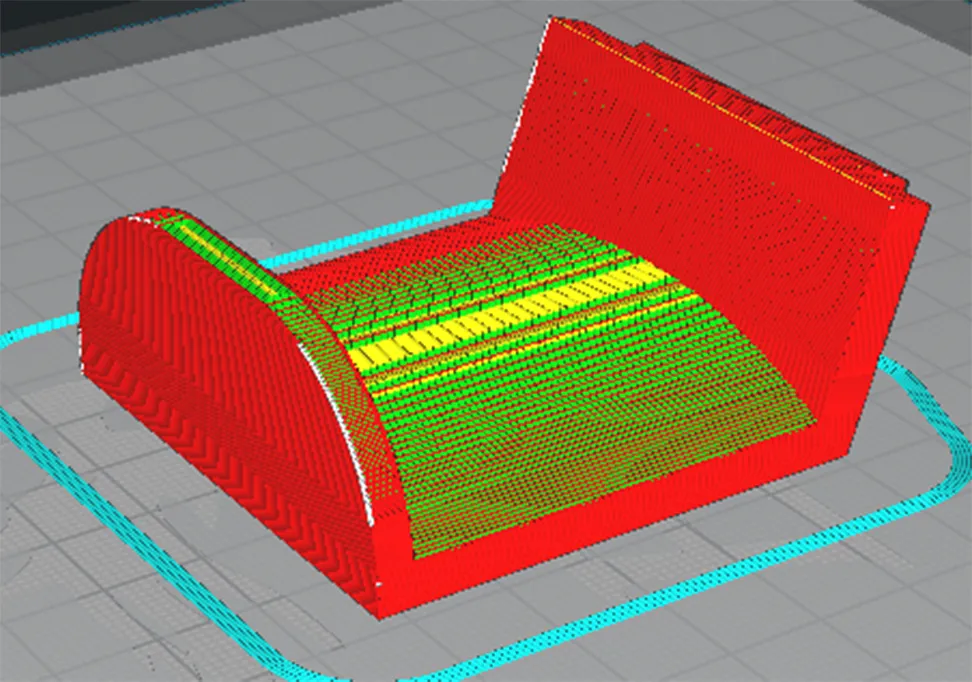
Layer adhesion is not a big issue. Thus printing with no supports to save materiel is preferred. Stepping is noticeable on the arched base in this orientation but this will not compromise the headphones or the mechanical integrity of the extension thus deemed acceptable.
Concept
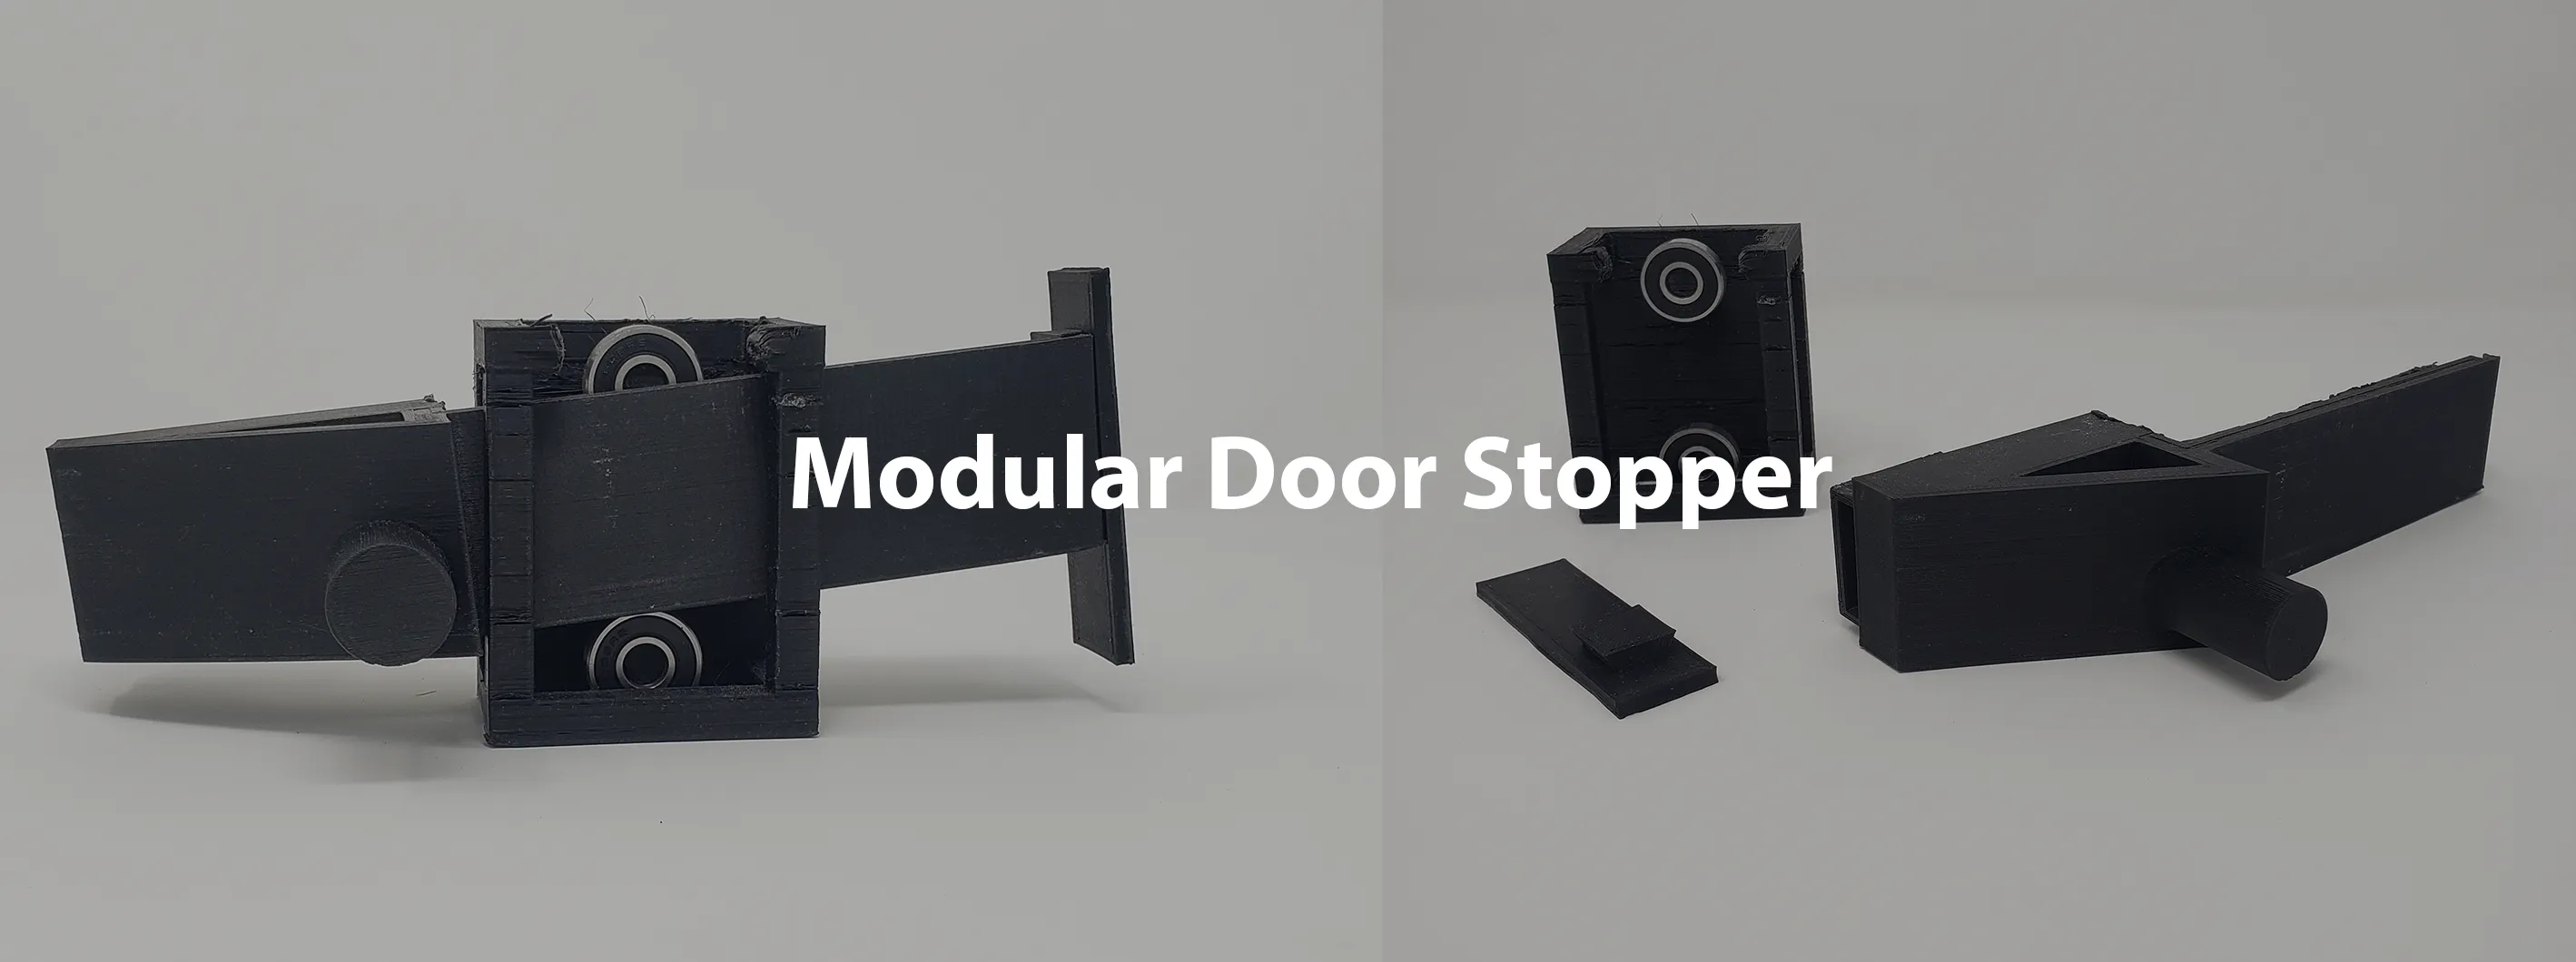
Designed for effortless sliding, this stopper seamlessly integrates into the existing pegboard mounting system. Keep your space safe and accessible with ease, as this innovative solution provides both convenience and peace of mind.
Design Process
Design Concept
Design Considerations
When designing the Door Stopper there were certain considerations that must be met.
1) It must use the same interlocking system as the controller mount.
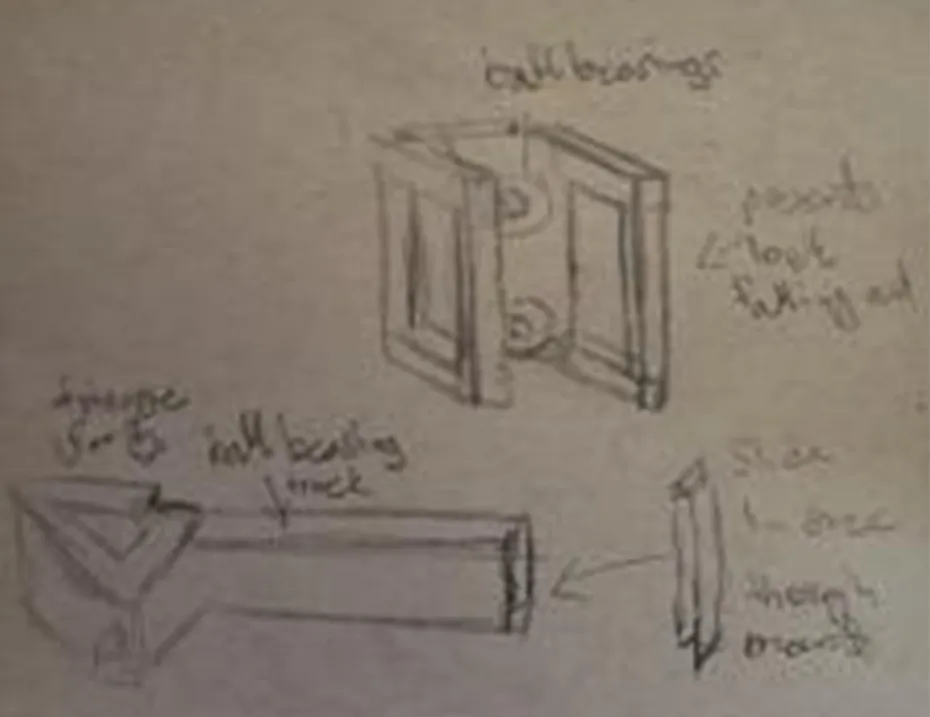
2) Ball bearings to make the sliding action smooth.
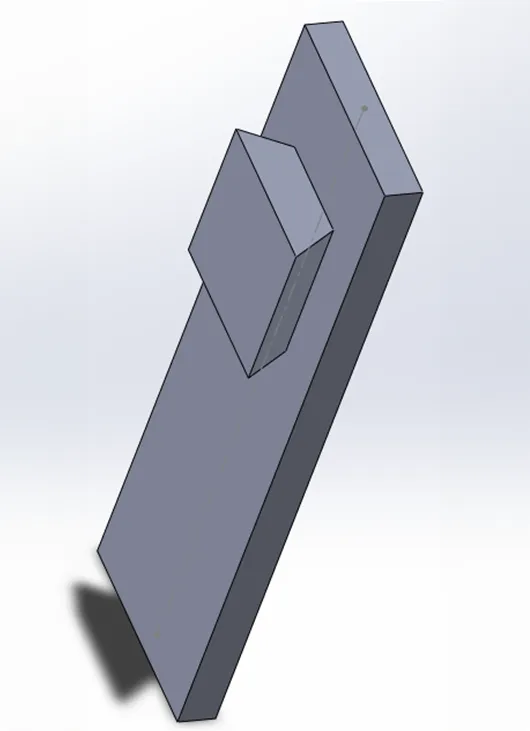
3) End cap will slide down into the end of the lock to stop it from falling out.
4) Triangle shape of the door stop will add extra strength.
3D Model
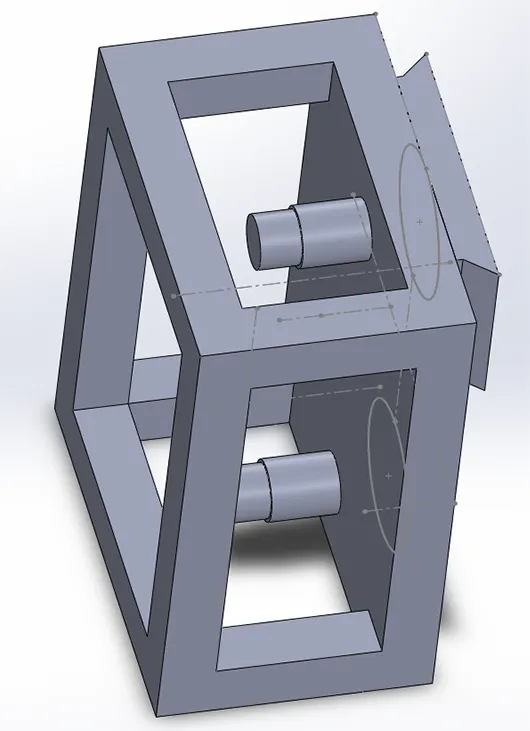
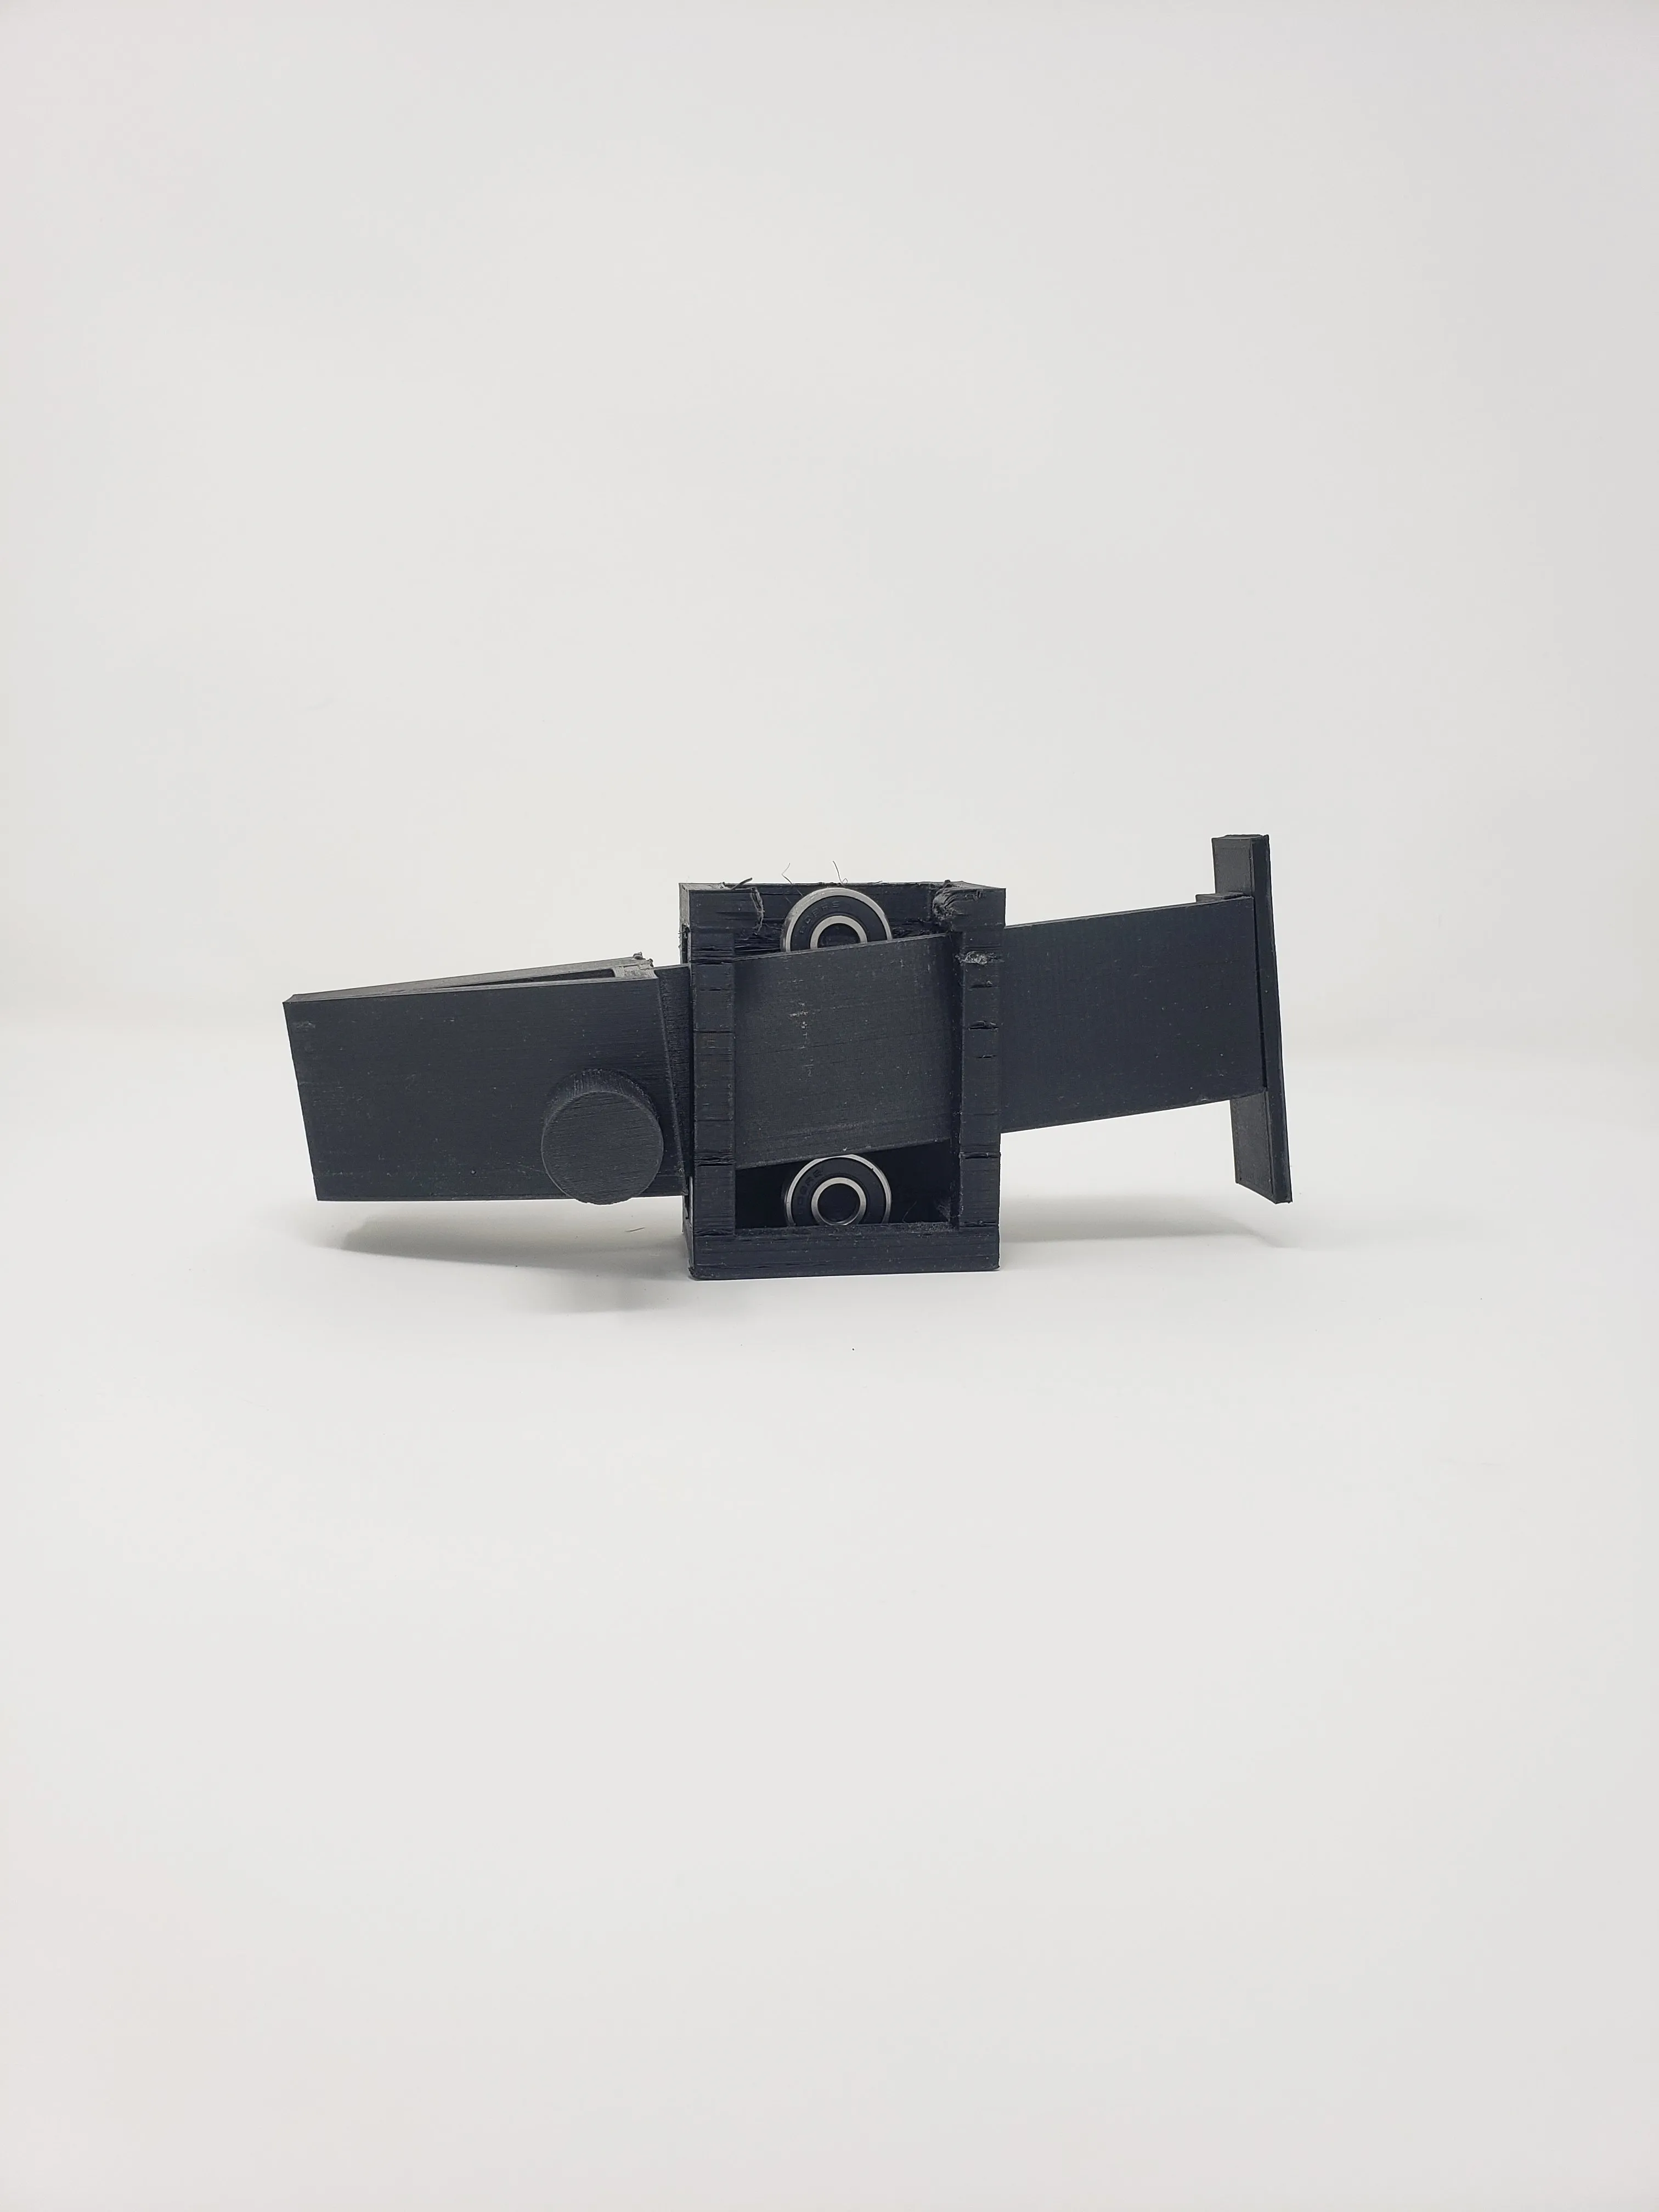
Housing
Ball bearings will fit snuggly into their pegs. the "cage" style housing mitigates the stress on the ball bearing pegs when the door is pushed against the stopper.
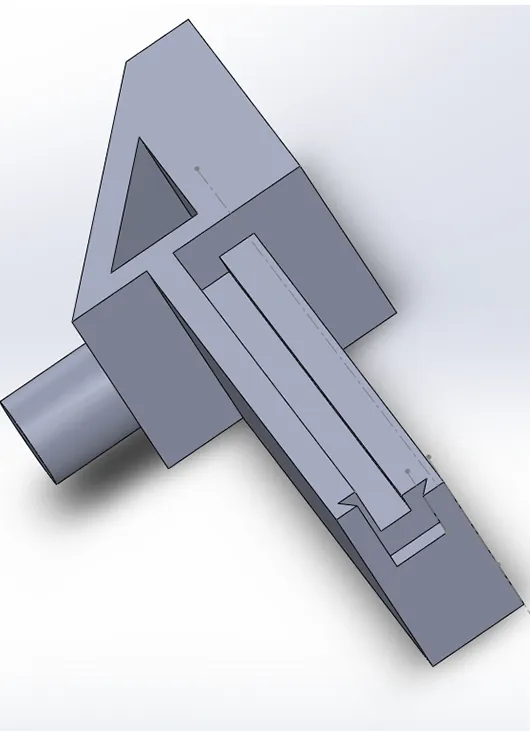
Stopper
End cap is cut through the ball bearing rail. The side of the rail that is facing the door is purposefully lower to accommodate the ball bearing mounting shaft.
End Cap
End cap using the same slide in lock as the base pegboard system.
Fabrication
3D Print
The force exerted on the part from the door will be perpendicular to the printing layers therefore, layer adhesion is not a big issue. This was printed with higher infill as it will be taking a lot of stress from the door.